


How to Create Lightboxes in Storyline 360 and Storyline 3
Article Last Updated
This article applies to:
Present any type of content in an easy, compelling way by triggering lightboxes to pop up when a learner clicks certain objects or player tabs in a Storyline 360 or Storyline 3 course.

Here's how to quickly and easily create interactive lightboxes in Storyline 360 and Storyline 3:
- Create one or more slides in your Storyline project that you want to lightbox.
- Then add a button on a different slide that will launch the lightbox.
- Add a trigger to the button with the following properties.
- Action: Lightbox slide
- Slide: Select the slide you want to lightbox.
- When: User clicks
- Object: Select the button that launches the lightbox.
- Use navigation controls: Mark this box if you want to display previous and next buttons on the lightboxed slide(s).
|
Storyline 360 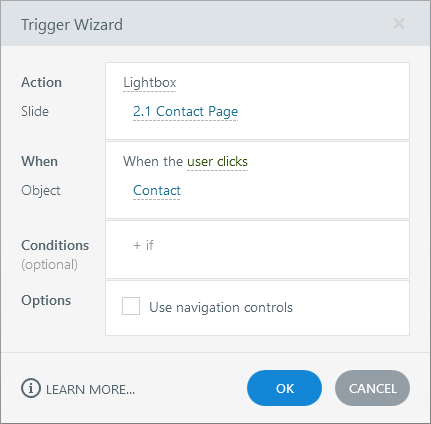 |
Storyline 3 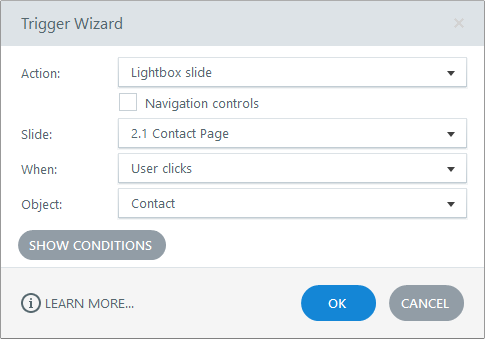 |
You can also set trigger conditions to control whether your trigger runs when the slide is in the player frame or lightbox. For example, here’s how to change the state of an object to Hidden when the slide is lightboxed:
- Action: Change state of
- Object: Select the object you want to hide
- State: to Hidden
- When: the timeline starts on
- Object: this slide
- Condition: If this slide is lightboxed

Learn more about lightboxes and find additional resources here: All About Lightboxes in Storyline 360